
How to Create Salesforce Escalation Rules
Retaining clients depends on having strong post-sales processes and balancing growth with the right procedures. While it’s okay to take extra time to resolve cases, it’s important to keep communication consistent to maintain transparency. Knowing how to set up Salesforce escalation rules is key to managing this effectively.
Escalation rules are invaluable for standardizing case timeframes, allowing executives and managers to focus on daily responsibilities. Salesforce’s expansive case management covers customer service, technical support, warranties, billing, and more.
What are Escalation Rules in Salesforce?
Escalation rules empower Salesforce organizations to automatically elevate cases upon meeting predefined criteria. These rules consist of two main components: Rule Entries and Escalation Actions. Let’s delve deeper into each of these components and explore how they are configured within the Salesforce platform.
Rule Entries
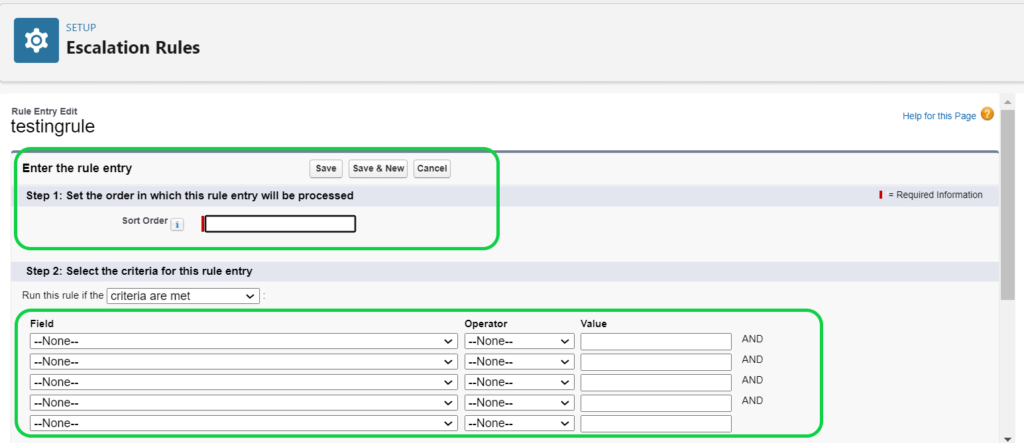
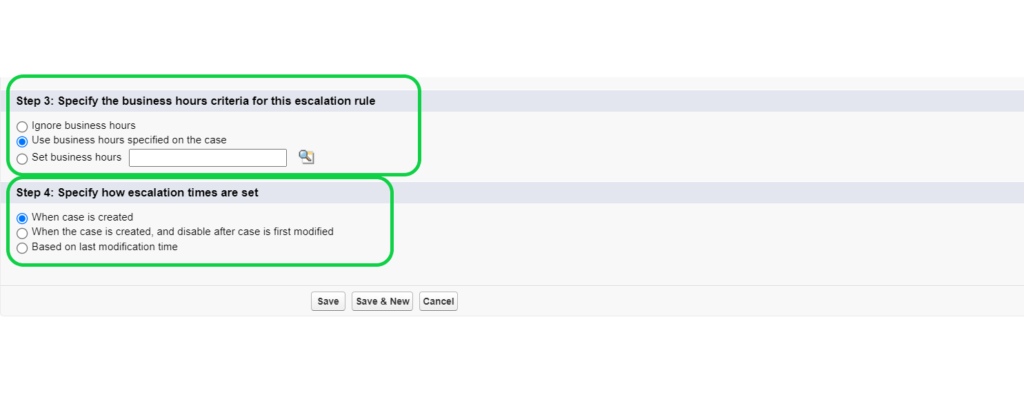
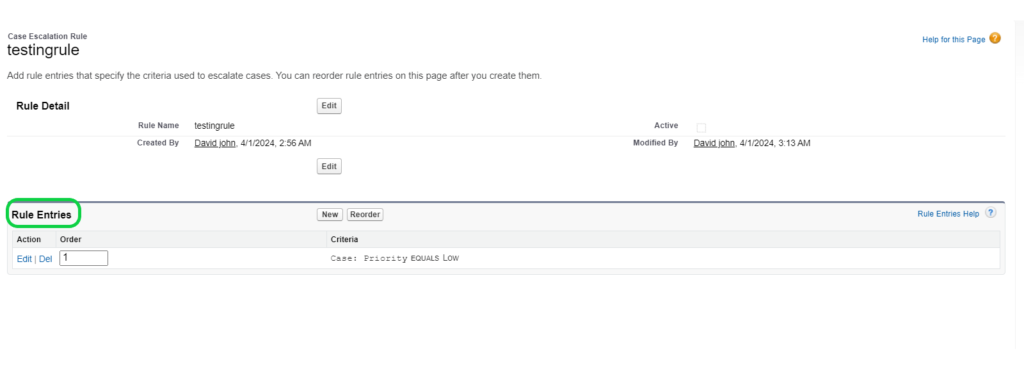
Order of Rule Entries: The significance of the rule entry order arises when dealing with multiple entries. This allows you to specify the sequence in which they execute, particularly when a case might meet the criteria of more than one rule. Editing this order is also possible from the main rule screen displayed below.
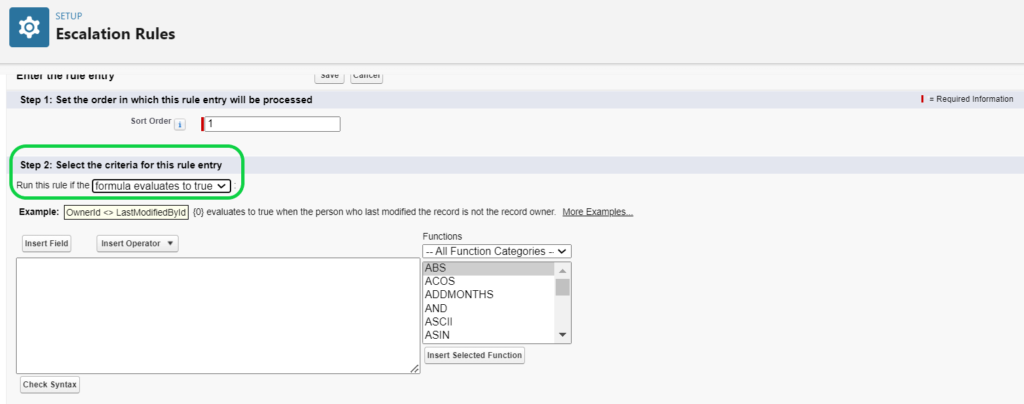
Rule Entry Criteria Values: This is where we define the criteria that trigger the rule action. We have the option to use case and related object fields.
Rule Entry Criteria Values: Let’s examine the two options:
- Criteria are met: Utilizing case and related object fields.
- Formula evaluates to true: Entering a custom formula to fulfill our requirements.
Business Hours: We offer three options, including the ability to create a distinct business hours record for a specific escalation rule!
- Ignore business hours
- Use business hours specified on the case
- Set business hours
Escalation Times: This is where we establish when the escalation countdown begins. We can select from the following:
- When the case is created
- When the case is created and disabled after the first case modification
- Based on the last modification time
Escalation Action Edit
Escalation actions define the timing and actions for cases to escalate. Each rule entry can include up to five actions, allowing for gradual escalation of the case over predefined time intervals. Let’s delve deeper into each of these actions and their configurations within Salesforce.
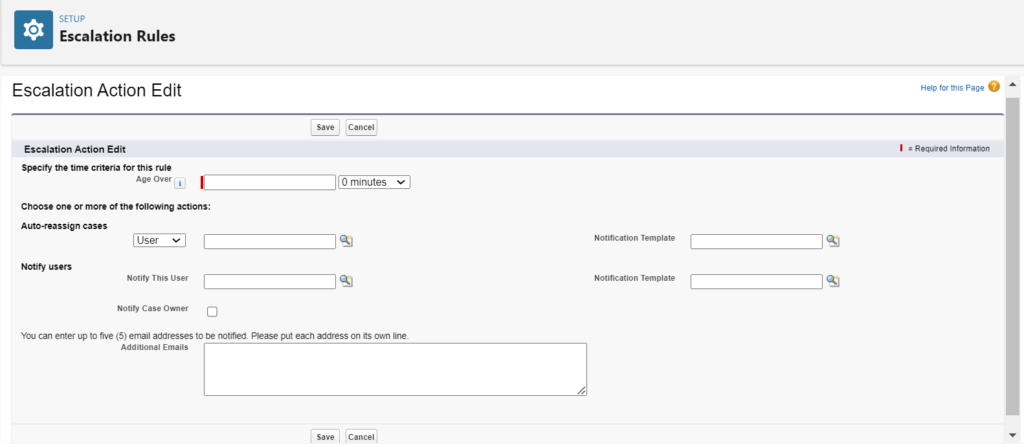
Age Over: Specify the number of hours and choose either 0 or 30 minutes from the dropdown menu. This setting works in conjunction with the selected Escalation Time value.
Auto-reassign cases: This option allows you to assign or reassign the case to a user and/or a queue, and send an email notification accordingly.
Notify Users: There are three notification options available:
- Notify an individual user.
- Notify the case owner by selecting the corresponding checkbox.
- Add up to five email addresses for notification purposes. Distribution lists can also be utilized to notify large groups of individuals.
If you intend to send notification emails when a case escalates, consider creating new email templates or modifying existing ones.
Case Studies
The flexibility of case escalation rules makes them adaptable to virtually any organization’s business requirements. In instances where a specific business need cannot be met, Salesforce’s automation features can be utilized as a viable solution.
How to Create Salesforce Escalation Rules: Let’s do it!
Tag:Automate case escalation in Salesforce, Customizing Salesforce escalation rules, Efficient Salesforce case resolution, How to Create Salesforce Escalation Rules, How to set up Salesforce escalation rules, Salesforce case management automation, Salesforce escalation rules tutorial, Salesforce support case escalation

