Create Custom Objects in Salesforce
To understand custom objects better, it’s important to first grasp the concept of objects in Salesforce and learn how to create custom objects in Salesforce.
Objects serve as containers that store information within your Salesforce org. Think of an object as a database table, where information is stored as field values.
To help visualize this, imagine an object as a table. The columns represent fields, and the rows represent records. Objects allow you to organize and view data using features like page layouts and object permissions.


Salesforce offers many capabilities with objects, and it comes with built-in objects known as standard objects, which are available by default. Examples include:
- Accounts
- Contacts
- Cases
- Leads
- Opportunities

As you can see, these examples are common terms used by many businesses. However, your organization is unique, and Salesforce’s standard objects might not always meet your needs. This is where custom objects become essential.
Custom objects enable you to store information unique to your organization, allowing you to extend beyond the capabilities of standard objects. You can create custom objects yourself or install them as part of a package from the AppExchange.

How to Create a Custom Object in Salesforce
Creating a personalized object in Salesforce is a straightforward process. Ensure you possess the necessary permissions within your organization. Once confirmed, proceed with the following steps:
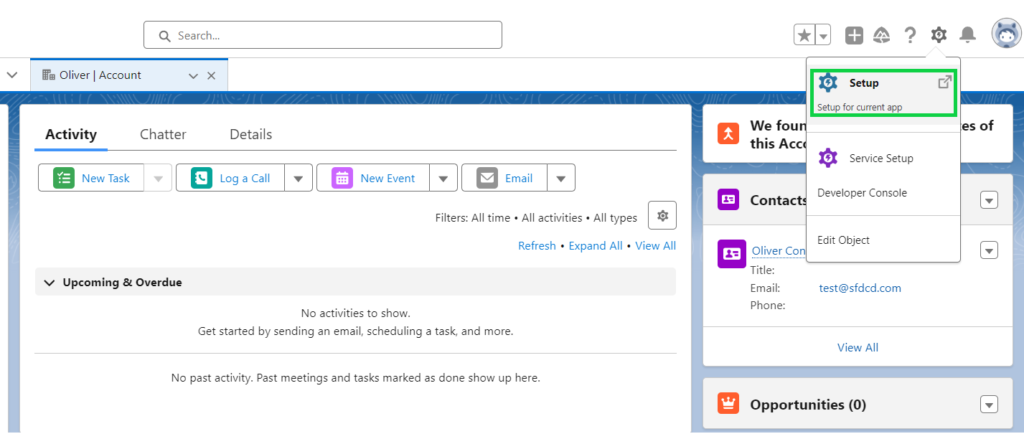
- Navigate to your Salesforce org, then click on the gear icon and choose Setup.

- Select the Object Manager
- Navigate to the top-right corner and click on Create, then choose Custom Object.

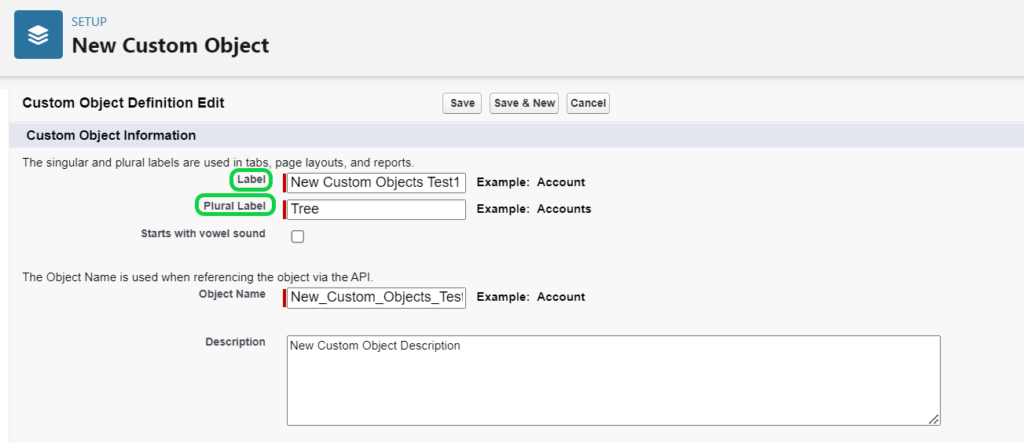
- In the Label section, input your preferred name for your custom object. The Object Name and Record Name fields will be automatically populated with the same name.
- For Plural Label, input the plural form of your custom object’s name.

- Navigate to the bottom of the page, then check the box labeled “Launch New Custom Tab Wizard” after saving this custom object. Enabling this option will incorporate your custom object into a tab within Salesforce.
- Select “Save.”

- Navigate to the Tab Style field on the New Custom Object Tab page and opt for a style. This selection determines the icon displayed in the user interface for the object.
- Simply click on Next, then Next again, and finally, Save.


3 Comments