How to Create a Campaign in Salesforce
When a Lead or Contact interacts with a marketing or outreach campaign you are running, a Salesforce Campaign keeps track of it. In this manner, money realized from won opportunities can be linked to the marketing efforts that facilitated their success when they close. Here’s how to Create a campaign in salesforce.
Merely pressing the “Add New” and “Save” buttons is only a small portion of a larger process when it comes to addressing the question, “How to create a Campaign in Salesforce?” Although it’s possible to start a Salesforce campaign in a matter of seconds, there’s more to it than meets the eye.
Make a campaign in Salesforce
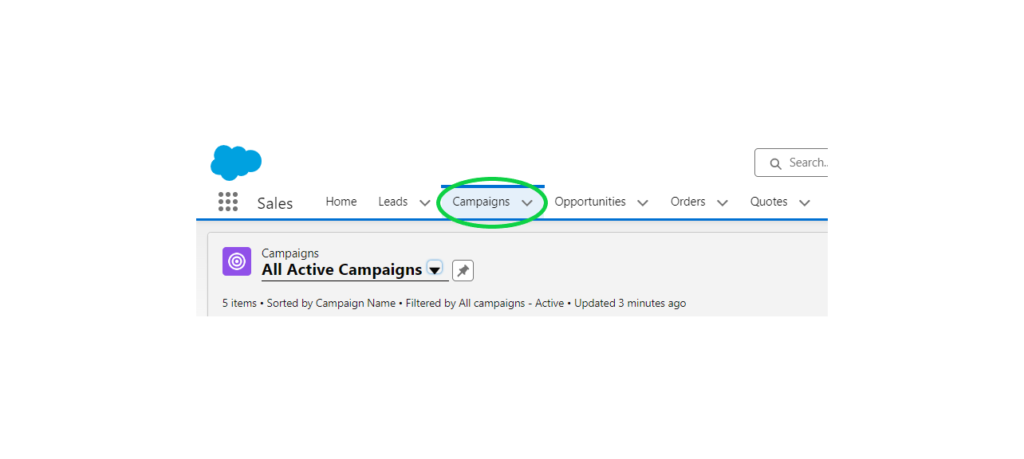
- Go to Salesforce’s “Campaigns” tab to create a Campaign. Click the App Launcher (waffle symbol, left of the navigation bar) and look for campaigns there if you don’t see this. By clicking the pencil symbol to the right of the navigation bar, you can add the “Campaigns” tab to your navigation bar if you need to use it frequently.

- Press the “New” icon to Create a Campaign in Salesforce.

- Campaign Name: You can enter the name of your campaign in the free text section. Adhering to a Campaign naming pattern is crucial, particularly as you start constructing your hierarchies and producing reports. Organize yourself from the start to save headaches later!
- Completion of the remaining fields will depend on how your Campaign page is laid out.
- Emphasize the “Active” check box.
- Choose a “type”. To add more values, ask your Salesforce administrator.
- Choose a “status”.
- You can concentrate your reports on particular time periods by using Start and End Dates.
- If you have the information, please fill in the following fields: Budgeted Cost in Campaign/Expected Revenue in Campaign/Expected Response (%).
- Enter the actual cost of your campaign here when it has ended

- Parent Campaign: This field is used to “lookup” the Campaign record that you want to connect to. In this instance, you are entering the Campaign into the Campaign Hierarchy that is one level above this Campaign. Planning your hierarchy is a topic we’ll revisit later in this tutorial
Statuses of Campaign Members
There is a “Member Status” for every Lead or Contact that will be added to your campaign as a Campaign Member. Thus, a person’s Campaign Member Status indicates how much they have interacted with a campaign (also known as the touchpoint).

Thus, after creating the Campaign (the base), go to the Campaign Member Status Related List (which is often located on the Salesforce Campaigns’ “Related” page). Is it absent? Here is how to add it.
Every new Salesforce campaign starts with the following two default Campaign Member Statuses pre-populated:
- Sent
- Responded
You can either update the pre-existing statuses or add new ones.

Arrange the Hierarchy of Your Campaign.
Rarely do campaigns stand alone. Consider organizing an event. Various marketing initiatives will support it, including sending out invitations via email, tracking attendance, and probably sending out a follow-up email following the event.
You should monitor each of these actions as distinct Campaign records in Salesforce, but you also want to be able to see the performance of the event in a broad sense. By creating a campaign hierarchy, you may benefit from the best of both worlds!

To define the Campaign above in the hierarchy, use the Parent Campaign variable (which I already mentioned):

When you first start, make sure to read this guide: Five Pointers for Setting Up the Salesforce Campaign Hierarchy
Customize Salesforce Campaigns to Yourself
You may want to think about adjusting the page layout to suit your needs in order to increase productivity using Salesforce Campaigns. Some examples of this include moving fields around and adding new custom fields, as well as modifying which components are shown and in what order.

The “page layout” must be edited for field location and visibility in Salesforce Lightning, whereas the “Lightning record page” manages components.
The most well-liked elements are:
- Lists related to this one include Notes/Files, Campaign History, Influenced Opportunities, Campaign Members, and Statuses of Campaign Members.
- Embed a report chart within the campaign.

Utilizing Pardot with Salesforce Campaigns
For Pardot users, the campaign setup process never ends!
Salesforce and Pardot share a Campaign record because of Connected Campaigns. This effectively connects all Pardot activity to the Salesforce Campaign.
Following a brief period of time during which the Salesforce Campaign syncs with Pardot, you can correlate Pardot marketing assets (emails, landing pages, forms, etc.) with the Campaign when making changes to them.
Remember not to forget! While Connected Campaigns are great, Pardot automation is necessary to make the magic happen. Campaign Member Status for the prospect is updated by Pardot automation. Completion actions are typically used when a prospect interacts with a particular marketing asset; additional possibilities, based on the use case, include automation rules and Engagement Studio activities.
Summary
You can now see that setting up a Salesforce campaign involves more steps than first appear. While it is possible to build a Salesforce campaign in a matter of seconds, it is advisable to take into account the associated features – Campaign Member Statuses, Campaign Hierarchy, and Connected Campaigns (Pardot) – in order to optimize reporting and account structure.
Tag:Campaign hierarchy in Salesforce, Create campaign in Salesforce, Salesforce campaign best practices, Salesforce campaign creation, Salesforce campaign management, Salesforce campaign member status, Salesforce campaign tutorial, Salesforce marketing campaign setup, Salesforce outreach campaign guide, Setting up Salesforce campaigns


