Use Formula Fields to Capture Lookup Field
In Salesforce, we utilize formula fields to dynamically compute values based on the data from other fields, including those linked through lookup relationships. These formula fields empower us to conduct various calculations and operations within our Salesforce environment. Additionally we can use formula fields to capture lookup field data within salesforce .
In this Salesforce training module, we’ll explore leveraging the formula field functionality to capture data from lookup fields within the Salesforce platform.
You’ve arrived at the ideal destination to master this procedure. We’ve extensively covered this subject in both Salesforce Lightning and Salesforce Classic editions. Now, let’s delve into some illustrative examples.
How to employ a formula field to capture data from a lookup field within Salesforce Lightning.
In this module, we’ll delve into leveraging formula fields to effectively capture data from lookup fields within the Salesforce Lightning environment.
Consider a practical scenario within Salesforce where the Opportunity object serves as a pivotal tool for tracking sales prospects. Each opportunity within this system is intricately linked to a specific product. Notably, the Opportunity object features a lookup field termed ‘Product_c’, establishing a direct reference to the Product object.
In this instance, we have the capability to generate a formula field within the Opportunity object, designed to record the name of the product associated with each opportunity.
Here are the sequential steps:
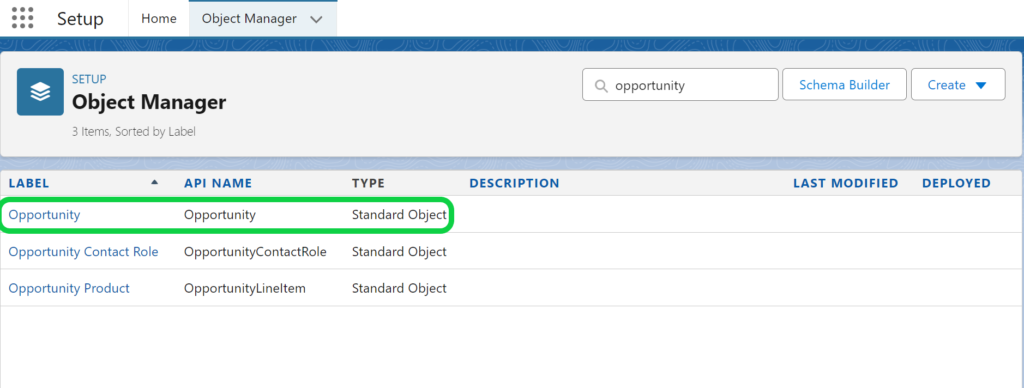
- To access your Salesforce account, first, sign in. Then, navigate to the gear icon and click on it. From there, proceed to Setup. Next, locate and select the Object Manager tab. Once there, choose the Opportunity object.
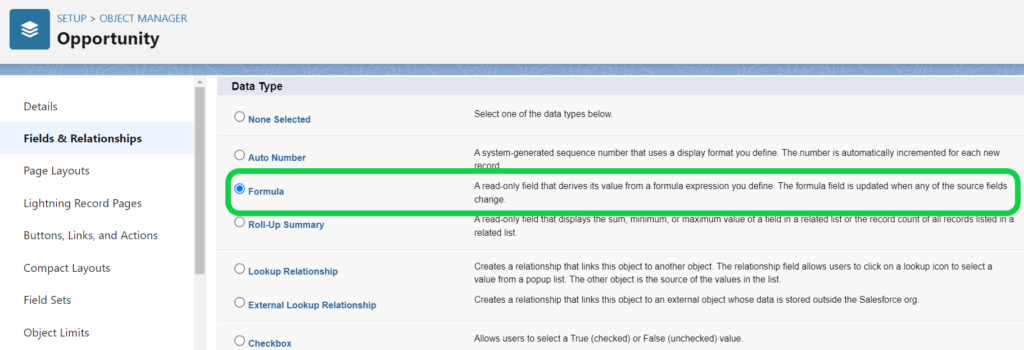
2. Navigate to the “Field and Relationship” section –> Click on the “New” button –> Choose “Formula Checkbox” from the options presented.
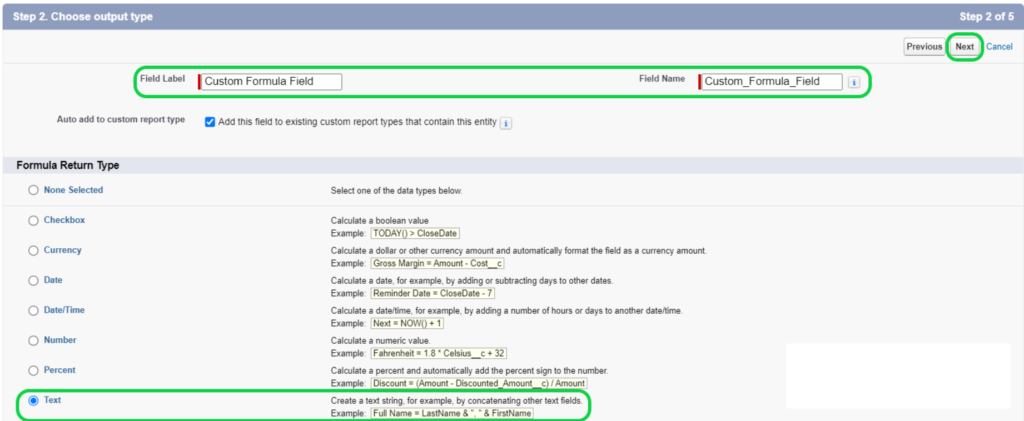
3. Now, select the output type. Begin by labeling the field as “Product Name” and then proceed to fill in the field name, which can be done with a simple click on the designated area. Next, determine the formula return type.
In this step, we’re selecting the formula’s return type as text. Once you’ve made your selection, proceed by clicking the next button.
4. Navigate to the “Advanced Formula” subtab –> Choose the “Insert Field” option –> From the available fields, select “Opportunity.” –> Click on the “Product” field within the Opportunity –> Choose the specific product name that you wish to incorporate into the formula field.
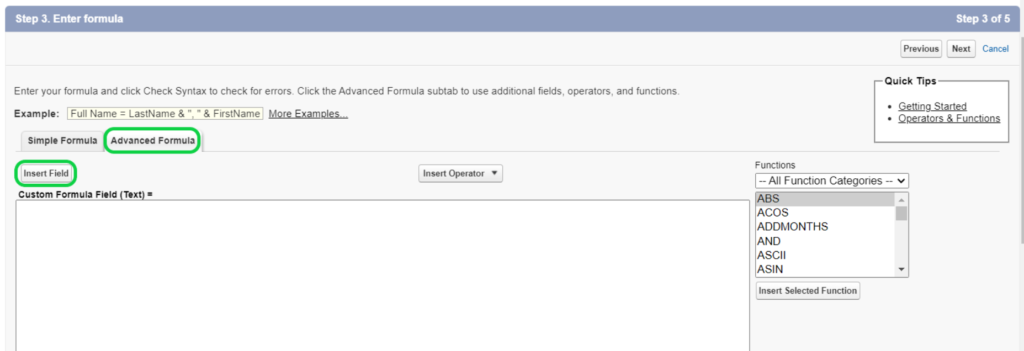
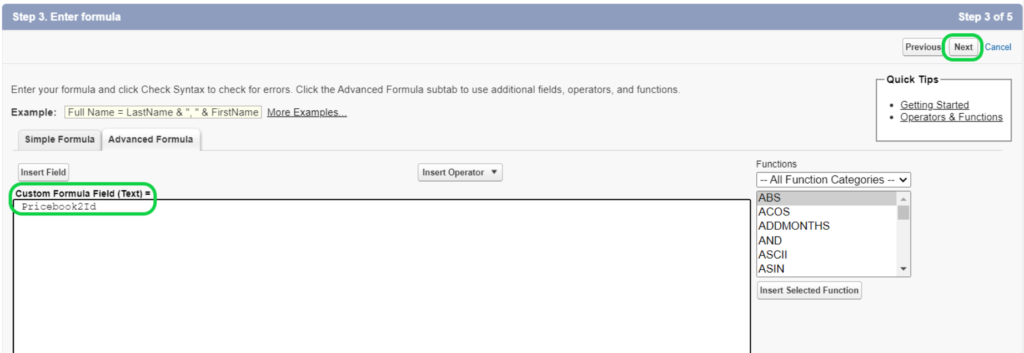
5. Now, verify the syntax to ensure there are no errors, indicating the correctness of our formula. Then, proceed by clicking on the “Next” button.
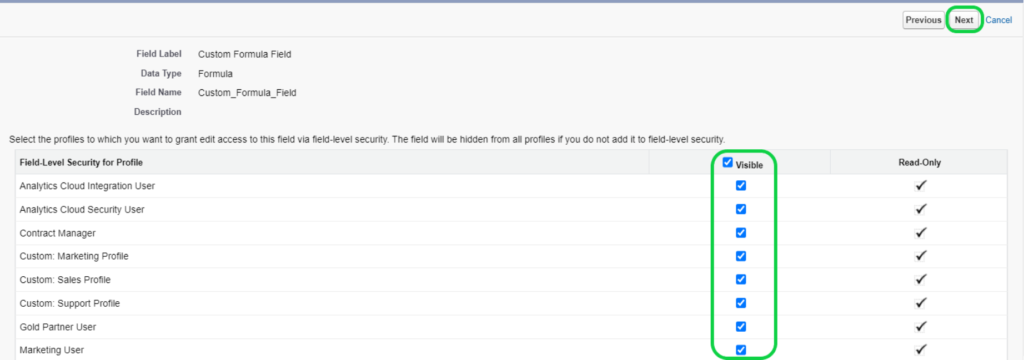
6. After formulating the field, proceed to set up its field-level security in accordance with Salesforce guidelines. Choose the profiles eligible for editing access to this field via field-level security. Then, advance by clicking on the “Next” button.
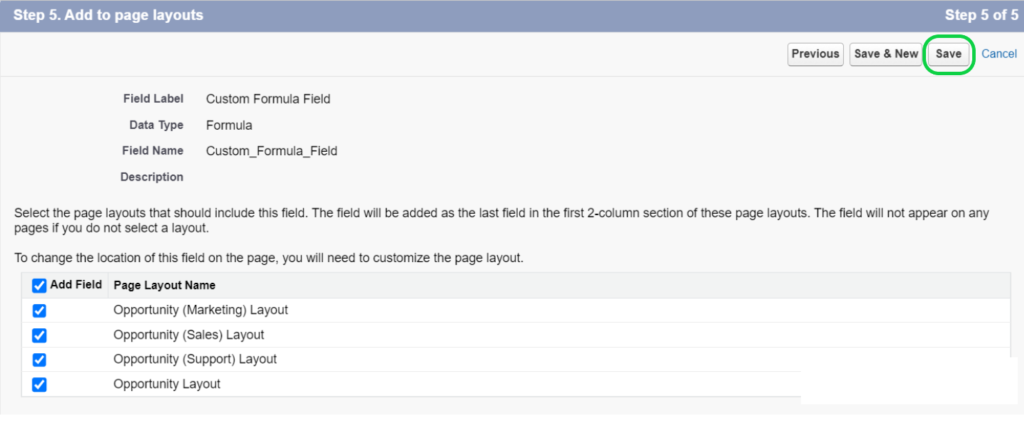
7. The field will be included in the second column of the field section on page layouts, positioned as the last item. Without selecting a layout, this field will not be visible on any pages. Remember to click the save button to apply the changes.
